
MODULE 1
How to Draw a Croissant?
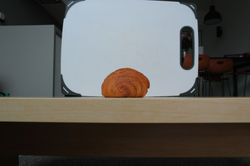
In this first task, I was tasked to photograph my croissant to produce an orthographic (plan, long elevation, short elevation) and to scan my cut croissant to produce sections.
I bought my croissant from Andrew’s bread shop, near Queen Victoria Market.

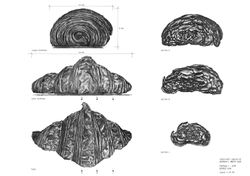
For the second task, I was tasked to trace my croissant to produce orthographic (plan, long elevation, short elevation) and section drawings.
My shading techniques are mostly made up of cross-hatching because it creates good tonal depth and contrast.

For the third task, I was tasked to set up an axonometric drawing of my croissant.
For the axonometric view, I combined cross-hatching with contour shading to give form to the croissant as the axonometric view forces me to re-imagine the croissant’s form and texture. I decided to give the drawing a source of light, hence the back of the drawing appears to be darker.
Reflection

FINAL CHANGES
According to the feedback from my tutor and classmates, I adjusted the contrast and levels in general, to let more white shine through the drawings.
PROCESS
Step 1
With the help of my Fujifilm, I created a make-shift studio using natural light and a white chopping board as backdrop (white balance).
I then adjusted the colours and lighting on Adobe Lightroom, before cropping them out in Adobe Photoshop using a Wacom tablet.
 |  |  |
|---|---|---|
 |  |  |
Step 2
Next, I went to MSD to use the scanners provided. The scans turned out blurry, but I moved on and edited them on Photoshop.
 |  |  |
|---|
Step 3
After editing them on Photoshop, I started to trace them out. Initially, I used greaseproof paper, but it turned out very blurry and so I changed it to tracing paper. After tracing the edges of the croissant, I scanned them first. This acts as a "progress marker" in case of errors in shading.

The marker proved useful when I had to redo one of my elevations after showing our progress in class. I decided to redo my short elevation, even though it received good critics because I felt that it was too messy and rushed.
 |  |
|---|
REFLECTION
This module has provided me with the basic foundations of design, which is to draw. Throughout this module, I was able to learn how to draw and shade an object in axonometric. Most importantly, I have learned the various orthographic projections used in architecture.
The use of tracing paper and Photoshop has helped me overcome many obstacles throughout my work. I was able to capture the details in the drawing because I had sharp images of the croissant.
I think the most challenging part of this module was to draw the axonometric projection with the leftover pieces of croissant and through memory. To ensure accuracy, I make sure all the lines drawn by the ruler is straight before starting. I was also unfamiliar with printing in MSD, so test printing a few times before printing my final A3 was necessary.
Overall, I think the whole process was rather enjoyable and I am happy with my results. I even shared what I did with my friends and had received many good comments.
Thank You For Viewing